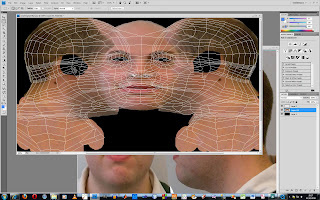
the texture painting is now just about finished i did this in photoshop using the mapping mentioned in the previous entry which i rendered and saved as a jpeg to use for this purpose. what i did next was to use the original reference pictures that were taken and started picking sections, like for example the forehead and nose and stuff, cutting them out of the photos and pasting them onto the guide map in an attempt at making a flat picture of the front and both sides of my face for fitting onto the head model to give it some texture. after i had spliced the different parts of the photos onto the painting i had to flatten the image and use the patch tools and the clone stamp tool to blend in the lines and the different tones across the face. now this is done the next step is to put it onto the head and see how well it fits and make changes as needed to get the best fit possible.
No comments:
Post a Comment